Build on NexumPay.
Get your Secret from the app, exchange it for a short-lived API key, and start requesting mobile money collections and tracking their status.
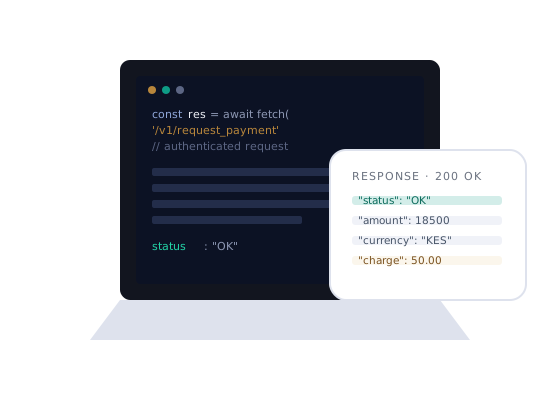
Real endpoints, real responses.
Every request below is something you can copy, run, and get a real response back from — no placeholder data, no separate sandbox dialect to learn.
From zero to your first API call.
This is a real sequence — each step depends on the one before it.
-
01
Download the NexumPay app
Get the app from bit.ly/3IGUPEf. This is where your business identity and wallet live.
-
02
Create and activate your Business Wallet
Set up your company profile inside the app and complete activation. This wallet becomes the root of everything you build.
-
03
Get your Secret from the app — no API call needed
Open the app, go to API Access, and tap Generate Secret. This Secret (also called the Auth Token) is issued directly by the app, not by an API request — copy it somewhere safe.
-
04
Exchange the Secret for an API Key
Call
generate_api_keywith your Secret in theAuthorizationheader. The API Key you get back is short-lived — plan to generate one right before you need it, not ahead of time. -
05
Call the API
Use the API Key to request a payment and check its status — from your server, not your app's client code.
One Secret, issued by the app. One API Key, minted per call.
The Secret never leaves the app on its own — its only job is to be exchanged for an API Key, which is what your integration actually calls the API with.
Business Wallet
Your activated company account inside the NexumPay app.
Secret (Auth Token)
Generated from API Access → Generate Secret inside the app. Used once, to request an API Key.
API Key
What your server calls the API with. Short-lived by design — regenerate it right before use.
Generate an API Key
Exchange the Secret from the app for an API Key. Do this right before you need to call the API — the key is only valid for 120 seconds.
| POST | /platform/api/generate_api_key | Exchange your Secret for a short-lived API Key. |
curl -X POST https://api.nxslate.com/platform/api/generate_api_key \
  -H "Authorization: Bearer $NEXUMPAY_SECRET" \
  -H "Content-Type: application/json" \
  -d '{
    "wallet_address": "B-A2E9-5AA5-4202"
  }'
<?php
$ch = curl_init('https://api.nxslate.com/platform/api/generate_api_key');
curl_setopt_array($ch, [
CURLOPT_RETURNTRANSFER => true,
CURLOPT_POST => true,
CURLOPT_HTTPHEADER => [
'Authorization: Bearer ' . $_ENV['NEXUMPAY_SECRET'],
'Content-Type: application/json',
],
CURLOPT_POSTFIELDS => json_encode([
'wallet_address' => 'B-A2E9-5AA5-4202',
]),
]);
$result = json_decode(curl_exec($ch), true);
$apiKey = $result['details']['api_key'];
curl_close($ch);const response = await fetch('https://api.nxslate.com/platform/api/generate_api_key', {
method: 'POST',
headers: {
Authorization: `Bearer ${process.env.NEXUMPAY_SECRET}`,
'Content-Type': 'application/json',
},
body: JSON.stringify({ wallet_address: 'B-A2E9-5AA5-4202' }),
});
const result = await response.json();
const apiKey = result.details.api_key;{
"status": "OK",
"message": "API Key generated successfully!",
"details": {
"api_key": "eyJ0eXAiOiJKV1QiLCJhbGciOiJIUzI1NiJ9...",
"expiry": "2026-07-31 09:14:19"
}
}
api_key from details — not the Secret — in every request from here on: Authorization: Bearer <api_key>.Collections & status
Every request below is authenticated with Authorization: Bearer <api_key>. Base URL: https://api.nxslate.com
| Method | Endpoint | Description |
|---|---|---|
| POST | /platform/api/generate_api_key | Exchange your Secret for a short-lived (120s) API Key. |
| POST | /platform/api/request_payment | Request a mobile money collection from a customer. |
| POST | /platform/api/transaction_status | Look up a transaction's current status by your own reference. |
Request a payment
Ask a customer to pay you over mobile money. NexumPay pushes the prompt to their phone and notifies your callback URL when it resolves.
curl -X POST https://api.nxslate.com/platform/api/request_payment \
  -H "Authorization: Bearer $NEXUMPAY_API_KEY" \
  -H "Content-Type: application/json" \
  -d '{
    "phone_number": "0771234567",
    "amount": "500",
    "narration": "Test collection",
    "reference": "100000005",
    "call_back_url": "https://yourapp.com/webhooks/nexumpay"
  }'
<?php
$ch = curl_init('https://api.nxslate.com/platform/api/request_payment');
curl_setopt_array($ch, [
CURLOPT_RETURNTRANSFER => true,
CURLOPT_POST => true,
CURLOPT_HTTPHEADER => [
'Authorization: Bearer ' . $apiKey,
'Content-Type: application/json',
],
CURLOPT_POSTFIELDS => json_encode([
'phone_number' => '0771234567',
'amount' => '500',
'narration' => 'Test collection',
'reference' => '100000005',
'call_back_url' => 'https://yourapp.com/webhooks/nexumpay',
]),
]);
$collection = json_decode(curl_exec($ch), true);
curl_close($ch);const response = await fetch('https://api.nxslate.com/platform/api/request_payment', {
method: 'POST',
headers: {
Authorization: `Bearer ${apiKey}`,
'Content-Type': 'application/json',
},
body: JSON.stringify({
phone_number: '0771234567',
amount: '500',
narration: 'Test collection',
reference: '100000005',
call_back_url: 'https://yourapp.com/webhooks/nexumpay',
}),
});
const collection = await response.json();| Parameter | Type | Required | Description |
|---|---|---|---|
| phone_number | string | Yes | Customer's phone number, e.g. 0771234567 |
| amount | string | Yes | Amount to request, e.g. "500" |
| narration | string | Yes | What the transaction is for |
| reference | string | Yes | Your own unique reference ID |
| call_back_url | string | No | Webhook NexumPay notifies with status updates |
{
  "status": "OK",
  "message": "Processing request please wait.",
  "details": true
}
status here is either OK or Fail; if it's Fail, the reason is in message. Call Transaction Status (or wait for your callback) to find out how the payment actually resolved.Check what happened to a transaction
Look a transaction up by the same reference you sent when requesting it.
curl -X POST https://api.nxslate.com/platform/api/transaction_status \
  -H "Authorization: Bearer $NEXUMPAY_API_KEY" \
  -H "Content-Type: application/json" \
  -d '{
    "client_ref": "100000005"
  }'
<?php
$ch = curl_init('https://api.nxslate.com/platform/api/transaction_status');
curl_setopt_array($ch, [
CURLOPT_RETURNTRANSFER => true,
CURLOPT_POST => true,
CURLOPT_HTTPHEADER => [
'Authorization: Bearer ' . $apiKey,
'Content-Type: application/json',
],
CURLOPT_POSTFIELDS => json_encode([
'client_ref' => '100000005',
]),
]);
$transaction = json_decode(curl_exec($ch), true);
curl_close($ch);const response = await fetch('https://api.nxslate.com/platform/api/transaction_status', {
method: 'POST',
headers: {
Authorization: `Bearer ${apiKey}`,
'Content-Type': 'application/json',
},
body: JSON.stringify({ client_ref: '100000005' }),
});
const transaction = await response.json();{
"status": "OK",
"message": "Your transaction status is: SUCCESS",
"details": {
"business_name": "My Business Wallet Name",
"source_mobile": "256704722190",
"status": "SUCCESS",
"amount": "550.00",
"narration": "Test collection",
"transaction_date": "2026-07-31 07:10:42",
"internal_ref": "723c56b9-c843-4f90-a6fb-0051f82006c8",
"client_ref": "100000005",
"charge": "50.00",
"trans_type": "COLLECTION"
}
}
details.status will be PENDING, SUCCESS, or FAILED. charge is the fee deducted from the collected amount, and internal_ref is NexumPay's own ID for the transaction — keep it alongside your client_ref for support requests.Keep these in mind while integrating
- The Secret is issued once, in the app — its only job is to be exchanged for an API Key.
- API Keys expire 120 seconds after they're issued and must be regenerated for each new request or short batch of requests.
- Every request is validated against both your IP and your business — calls from an unrecognized source are rejected even with a valid key.
- Never embed your Secret or API Key in client-side app code — generate and use them from your own server.
Need a hand integrating?
Create and activate a Business Wallet in the NexumPay app, then reach out if you get stuck wiring up collections or status tracking.